|

|
|
| How to Post Photos |
REGISTER (click here)
|
|
|
|
| How to Post Photos |
REGISTER (click here)
|

|
 SMP Silver Salon Forums SMP Silver Salon Forums
 American Sterling Silver American Sterling Silver
 photos at ONC photos at ONC
|
 SSFFriend: Email This Page to Someone! SSFFriend: Email This Page to Someone! |
next newest topic | next oldest topic |
| Author | Topic: photos at ONC |
|
middletom Posts: 467 |
  
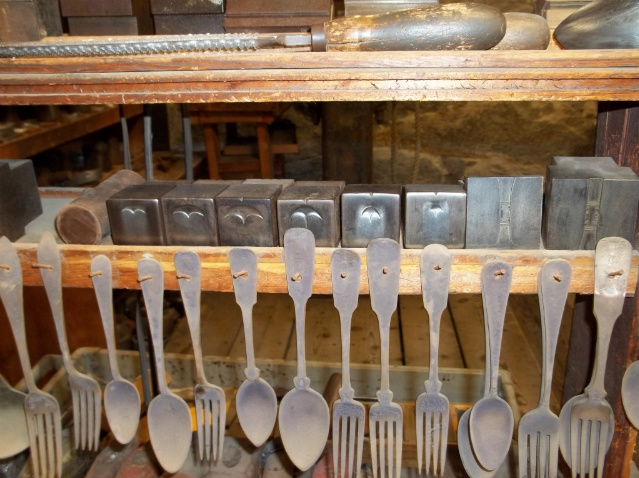
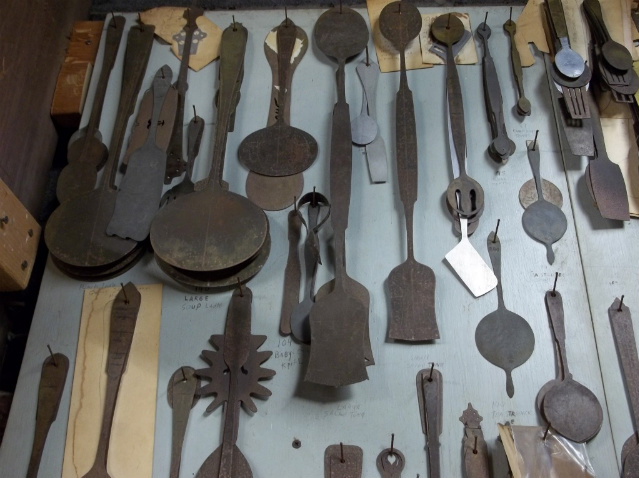
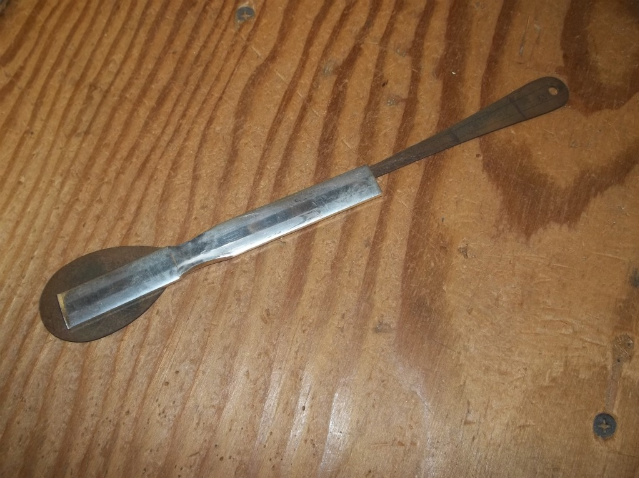
[01-2913] I'm making an effort to post some more pictures taken with my new camera, 14 megapixels as opposed to 3.2 megapixels before. These show some of our dies with designs for tips of handles. There are the shell patterns, Oakleaf and traditional tip designs for Moulton and Old Newbury. IP: Logged |
|
middletom Posts: 467 |
Well, I got two for the price of one, but two of the same picture. I'll try the other picture. IP: Logged |
|
Scott Martin Forum Master Posts: 11520 |
Your photos are much clearer and better exposed. I am glad that your photography adventure is progressing so nicely I am sure we all would like to see more of ONC and any projects? IP: Logged |
|
Ulysses Dietz Moderator Posts: 1265 |
My brother and sister-in-law's wedding silver pattern... IP: Logged |
|
middletom Posts: 467 |
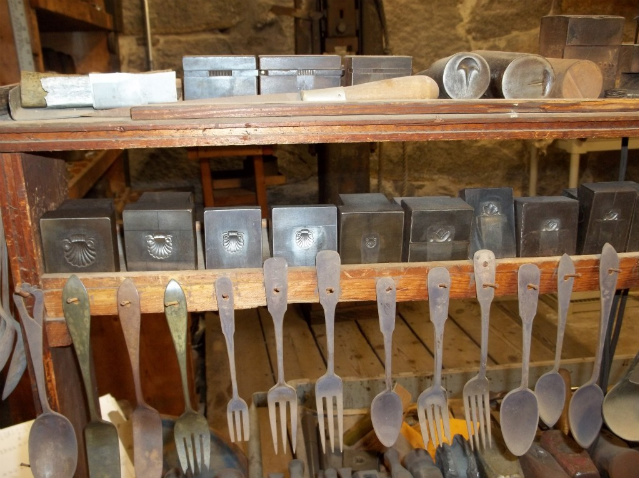
Ulysses, Which is you brother and sister-in-law's pattern? Or were you just day dreaming? In the first picture, on the shelf above the shell and oakleaf dies are tip dies for the Karen pattern. To the right of the tip dies in the second picture are dies for hammering in the detail on the stem of the Karen handles. The butter spreaders for that pattern are too wide to fit into those dies, so we file in the detail for the handle. I think Gustav Anderson filed that handle stem design on all his pieces, but when ONC took over the pattern, we had dies made so that the design could be quickly hammered into the pieces. middletom IP: Logged |
|
middletom Posts: 467 |
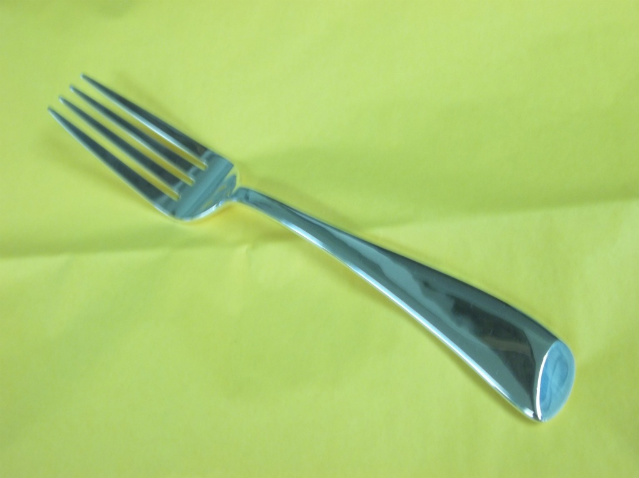
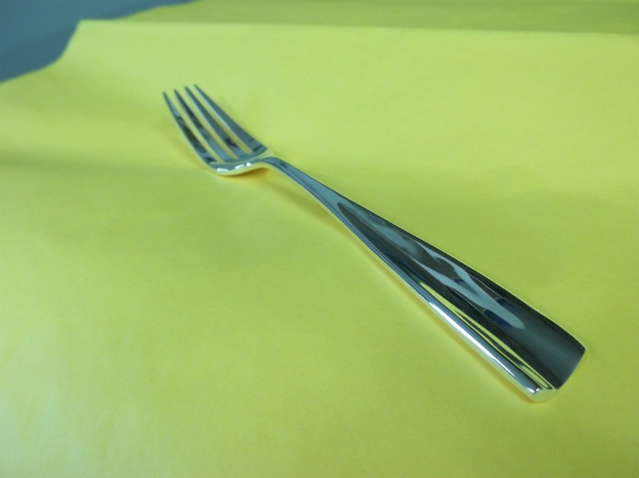
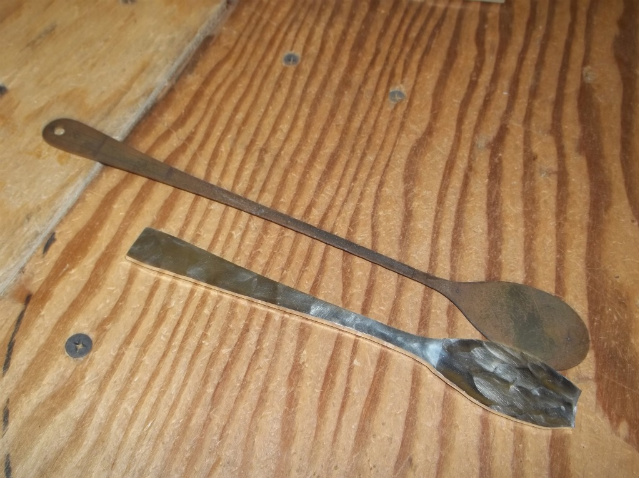
This is a picture of a fork I made to the design of Tom Penn, a designer from New York. I made a place setting which he has and one extra fork. To have the thickness at the end that was called for, I started with a block of silver .257 thick, and three inches long. I hammered down the thinner sections from there. It is not a practical method for production. middletom IP: Logged |
|
middletom Posts: 467 |
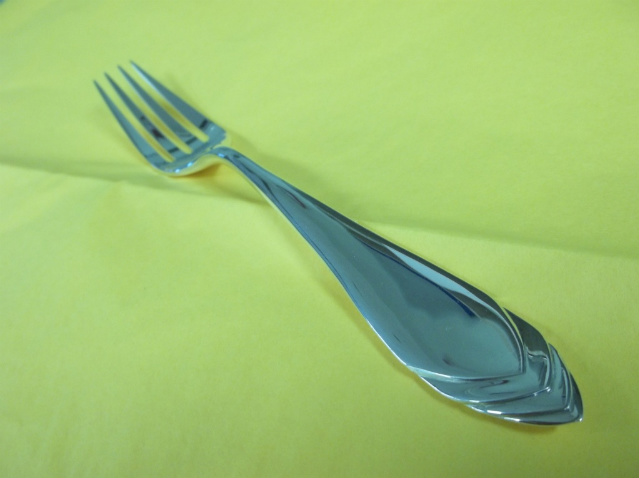
This fork was designed by Bob Lapham and me in response to initial interest in a larger, heavier pattern suggested by Mr. Dooney as he was starting purchase of the company. Typically, he forgot about the idea about as soon as it came out of his mouth. The handle end was my design and Bob made the piece, doing the fork tine section as he felt would go best with the handle. It required a great deal of filing at the end of the handle, so was also not very practical to make. middletom IP: Logged |
|
doc Posts: 728 |
I have to say I love Mr. Dooney's fork. I had a similar type of boss in a former life, so thought I'd pass on this word of advice. I would wait until my boss came to me a second time about an idea, and then I knew he was serious and would start to look into it (only happened about 10% of the time). Saves a lot of time and effort! IP: Logged |
|
middletom Posts: 467 |
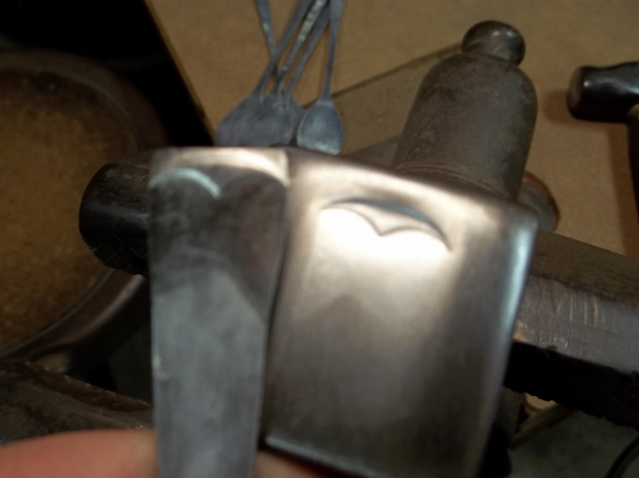
Here is another piece designed by Tom Penn. It was designed to win approval from Donna Karan, as she wished to have her own line of flatware. It was an interesting piece to make, to translate it from the modeling wax Tom used to make the model into silver. Donna Karan didn't like the design, so it went nowhere. IP: Logged |
|
middletom Posts: 467 |
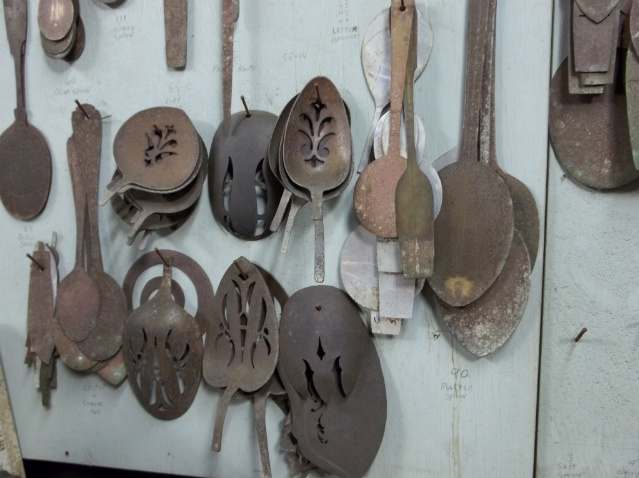
As you requested, Scott, I have some pictures from around ONC. This one shows a number of piercing patterns for various tablespoons and other serving pieces such as pie servers. middletom IP: Logged |
|
middletom Posts: 467 |
This shows a lot of our serving piece patterns. At the top left are the punch ladle and soup ladle patterns and to the right of them are the large salad tong, then the small salad tong followed by the ice tong and pasta tong (on the same nail), then the sugar tong and the bon bon tong. You can also see the two patterns for the large and small tea strainers. Beneath the soup ladle patterns is the pattern for the pasta server (it has its fingers spread out). middletom IP: Logged |
|
Scott Martin Forum Master Posts: 11520 |
Thank you. I look forward to more. IP: Logged |
|
middletom Posts: 467 |
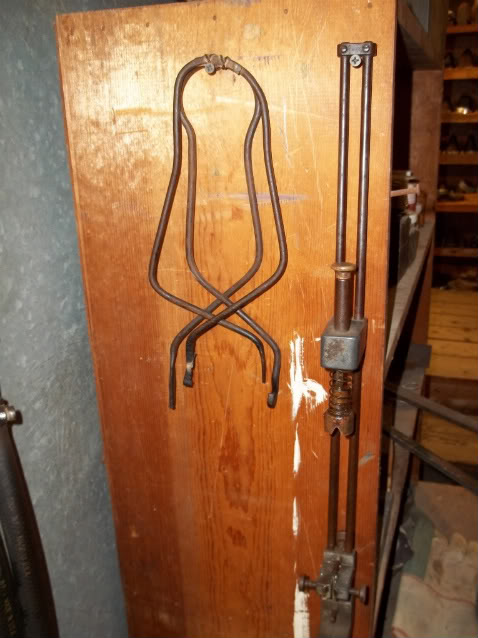
This picture shows the holders for knives as they are being soldered together. The bigger one on the right holds dinner knives and luncheon knives. The old ones on the left, made from iron rod, are used for larger pieces such as carving knives and forks. middletom IP: Logged |
|
middletom Posts: 467 |
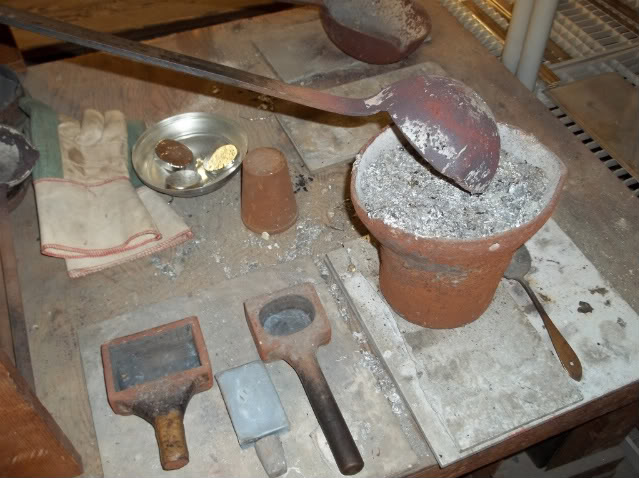
Here is the area where we melt lead for the foot drop when we shape spoon bowls. We melt the lead in the ladle and in the foreground are two molds used to make blocks of lead we use in bending the flatware. middletom IP: Logged |
|
agleopar Posts: 850 |
Hi Tom, this is a great tour and the images are terrific. In the last image you said "in the foreground are two molds used to make blocks of lead we use in bending the flatware." Is it possible to show that as it happens - I am curious as I never really got how to do it? The spoon maker (Potter and Son on St. John St. Clerkenwell, London) who showed me used a lead hammer and female form he made, remelting and molding it once a week. but I never really got the technique he used and why the lead - except it did not mark the spoon/fork when he "cranked" it (his word). I have always fudged it with wood or leather. IP: Logged |
|
bascall Posts: 1629 |
These images have been a pleasure to see. Sometime, when it's convenient, would you mind showing an image of a die and hub and how they work together? I've only read of die and hub cutters and a basic description of how the die and hub are used together. Many thanks, Pat [This message has been edited by bascall (edited 04-07-2011).] IP: Logged |
|
middletom Posts: 467 |
Agleopar, I would be more than happy to show how the bending is done. I'll take some pictures soon. The rectangular mold makes blocks upon which we plannish the finished handle, hammering lightly down the back, to give a slight crown to the piece, removing the flatness that results from deing forged and plannished on the anvil. The small oval mold makes lead pieces that we use as hammers when doing the actual bending of the handle. That bending is done on hard wood blocks. middletom IP: Logged |
|
middletom Posts: 467 |
Bascal, I am unfamiliar with the terms "die and hub". Can you give me some idea as to what they are used for? Where have you heard the terms? middletom IP: Logged |
|
middletom Posts: 467 |
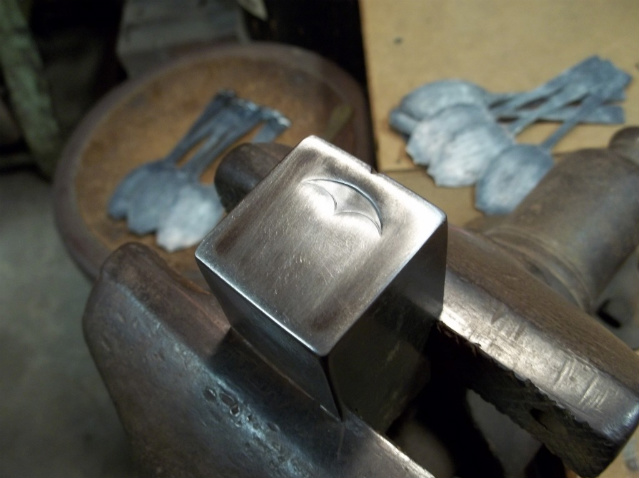
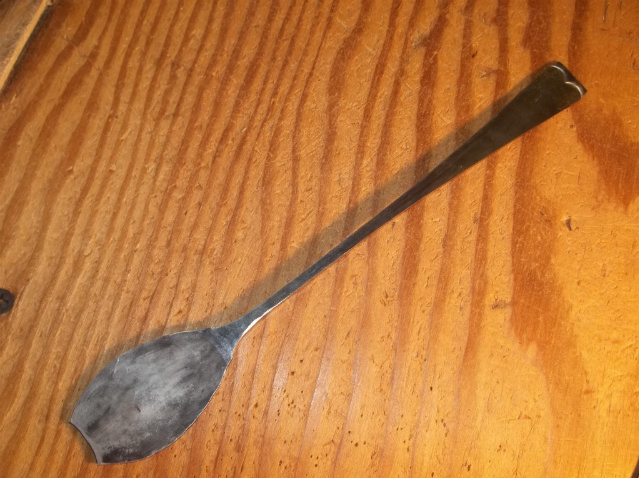
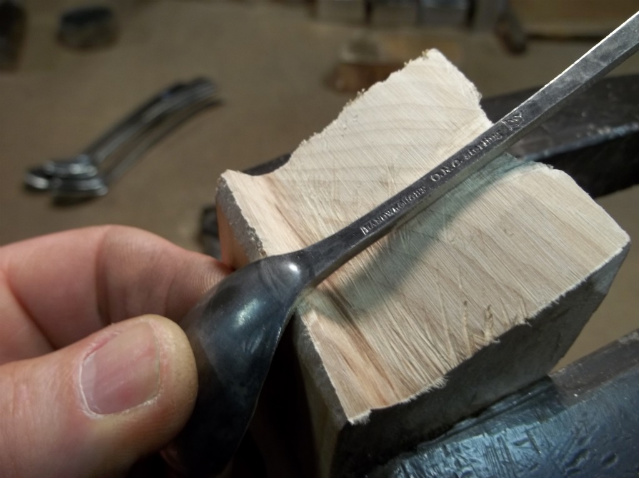
Here is a photo of a tip die (that is what we call it) our second in size for patterns Moulton, Wilton and Sturbridge. I was at this point hammering the design into some European sixe place spoons. The handles are hammered out 3/4 of the way to full length. middletom IP: Logged |
|
middletom Posts: 467 |
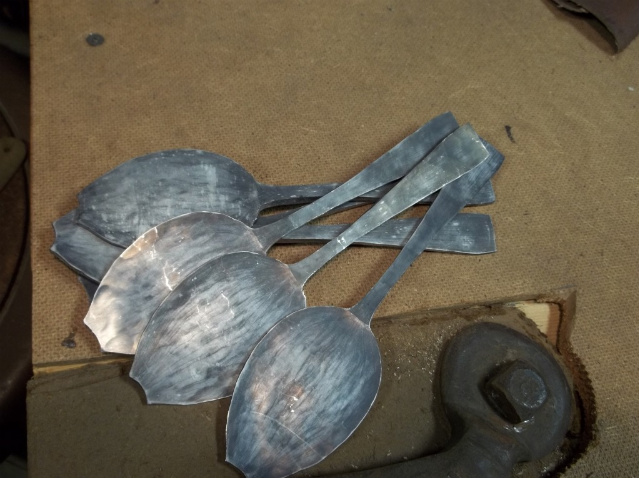
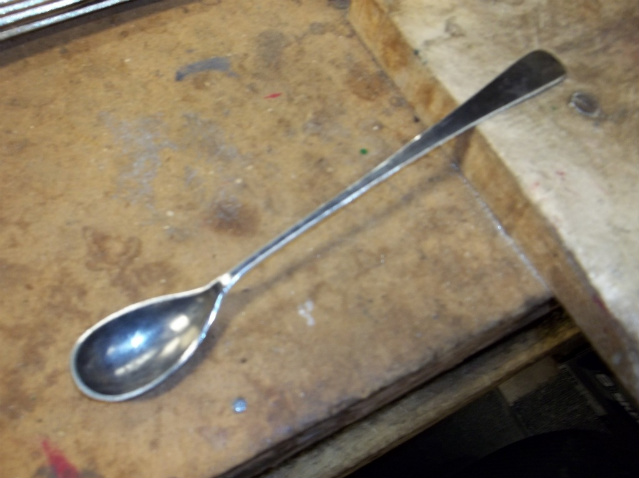
These are the spoons, with the handles 3/4 of the way and the bowls are forged out to size and plannished. middletom IP: Logged |
|
Scott Martin Forum Master Posts: 11520 |
 IP: Logged |
|
middletom Posts: 467 |
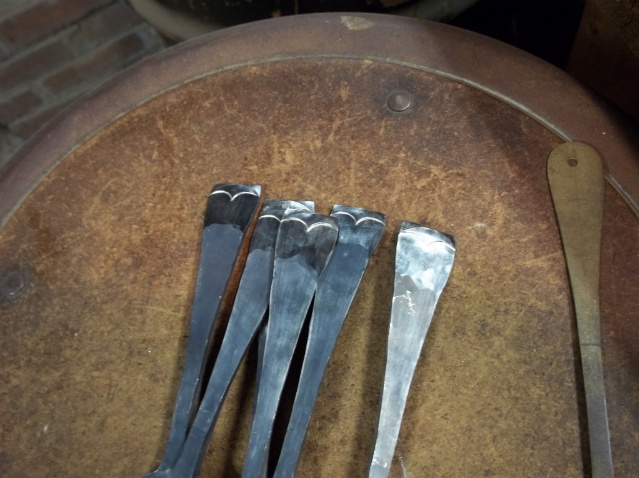
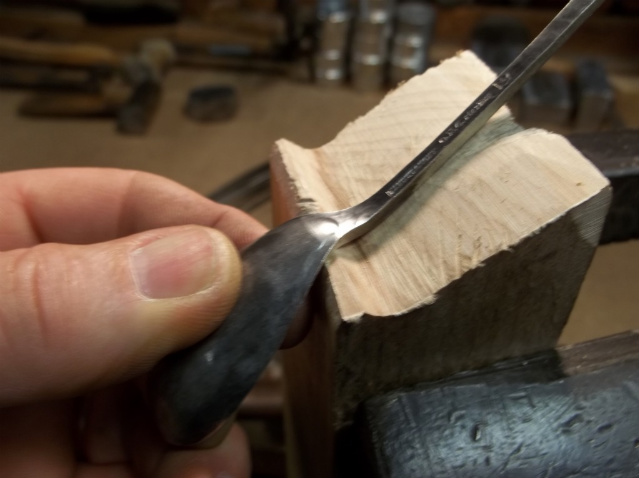
these are the spoons with the tip design hammered in. They are now ready for the final forging to size. We refer to this size spoon as "European" because in the mid eighties some of our store customers pointed out that European china makers were making plates of a larger size and those dwarfed the standard American size pieces. So, using samples of European forks and place spoons, we added these larger forks and spoons to our offering and many people have chosen them over the standard size. middletom IP: Logged |
|
bascall Posts: 1629 |
I'm not the best person at all to describe the hub and die. I can only guess that they are associated primarily with the machine production of silverware, and because your work is mainly done by hand, they're just not something you would need to know much about. Thanks for your response though. IP: Logged |
|
dragonflywink Posts: 993 |
Enjoying this thread..... ~Cheryl IP: Logged |
|
middletom Posts: 467 |
I thought I'd do a series of shots of the making of ice beverage spoons. This first shot is of the silver blank, notched where the handle is differentiated from the portion that will be the bowl. This next picture shows the handle hammered one third of the way and the bowl hammered half way. It needs to be annealed. This shows the piece with the handle 2/3 the way to length and the bowl to full size and plannished. It will be annealed for the last time. middletom IP: Logged |
|
middletom Posts: 467 |
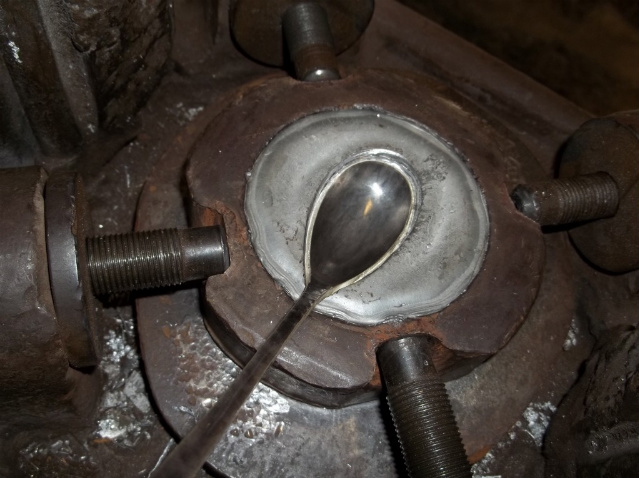
Here the design on the back of the tip is hammered in. Now the piece has been hammered out to full length and plannished. In the case of these pieces the customer wished to have the handle overhammered front and back. After fling the excess silver from the piece, the overhammering is applied to the piece. Here the bowl has been shaped in the foot operated drop. There is a cast iron punch (not visible) and a lead impression into which the bowl of the spoon was struck. middletom IP: Logged |
|
middletom Posts: 467 |
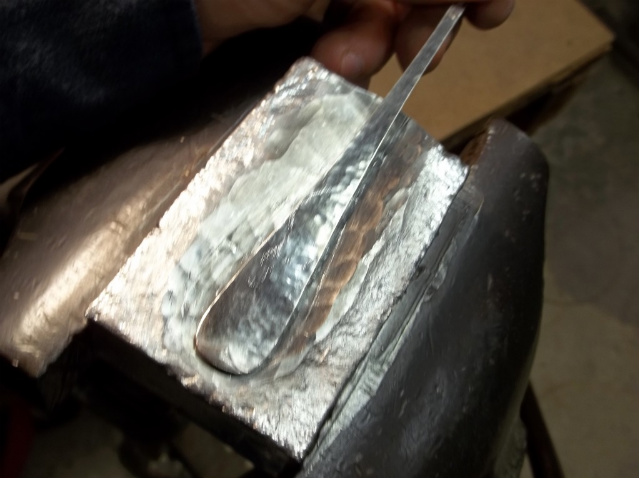
This is the stage, Agleopar, that involves hammering down the back of the piece as it lies on the block of lead. Because of the overhammered finish, I don't use a hammer to do this but an oval block of lead. It will get the same crowning appearance in the piece but will not mar the hammered texture. Here are the spoons just before bending and the oval lead block used for the bending. The wood block with the end used for bending back the tip of the handle. middletom IP: Logged |
|
middletom Posts: 467 |
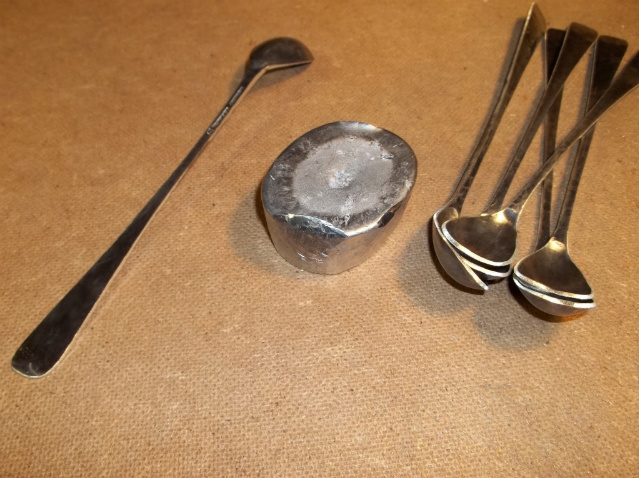
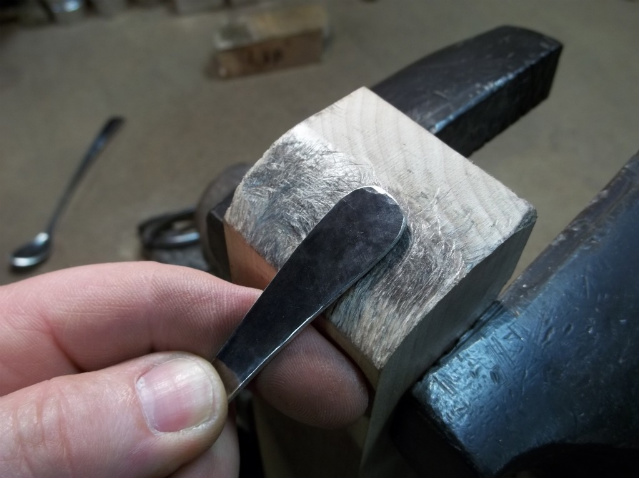
In this picture, the spoon is laid on the wood block with the neck of the handle straddling the groove filed in the block. Using the lead block as a hammer, I will hammer the neck, bending it around to get the desired shape to the handle. Now you can see how the neck of the handle was hammered dowm into the groove, creating the bend in that portion of the handle. This is the piece properly bent and just needing final filing and polishing. I hope these pictures have given you some idea as to what goes into making a piece of handwrought silver. middletom IP: Logged |
|
adelapt Posts: 418 |
Thanks Middletom for showing how out of the heat and the dirt and the noise you create something beautiful. It's always a source of delight to me. IP: Logged |
|
Scott Martin Forum Master Posts: 11520 |
Thank you so much. Your photos and posting of the photos gets better & better. If there are more please continue in this thread or in a new thread. Thanks again. IP: Logged |
|
middletom Posts: 467 |
Scott, We'll soon be making some serving pieces for a big order. There should be interesting pictures there. Geoff IP: Logged |
|
agleopar Posts: 850 |
Geoff - Thanks so much, you have given the image that has triggered the memory of why and how the Potters used lead to crank (bend) the spoon handle. It is not the easiest thing to do well without a system. In London the Potters cast a U shaped lead form (about 3 inches) with a tail that they put in a vise. A lead hammer head was cast onto a handle and the spoons were hammered between the two. They would recast both very frequently. I can't wait to try your technique with the wood block. One thought is instead of lead these days why not a polypropylene or nylon hammer - I use them for repairs and they would last a long time without marking? For that matter maybe instead of the wood too?? I reshape the plastic as needed. Thanks so much for all the images it is great to see the tradition being carried on! IP: Logged |
|
middletom Posts: 467 |
Agleopar, I'm glad I could clear that up for you. The wood blocks we use are hard or rock maple. We found out a few years ago that not all maple is created equal. Regular maple is too soft to hold up to the pounding. As to why we haven't transitioned to the plastic hammers you mention,we were not aware of those new types and as we have a lot of lead and we are a bunch of sticks in the mud, tradition has held sway. I guess that we are so accustomed to the way we have always done it that we are resistant to changing now. middletom IP: Logged |
|
agleopar Posts: 850 |
Thanks Tom and I too know the old dog syndrome well! IP: Logged |
All times are ET | next newest topic | next oldest topic |
  |
|
Ultimate Bulletin Board 5.46a
|
1. Public Silver Forums (open Free membership) - anyone with a valid e-mail address may register. Once you have received your Silver Salon Forum password, and then if you abide by the Silver Salon Forum Guidelines, you may start a thread or post a reply in the New Members' Forum. New Members who show a continued willingness to participate, to completely read and abide by the Guidelines will be allowed to post to the Member Public Forums. 2. Private Silver Salon Forums (invitational or $ donation membership) - The Private Silver Salon Forums require registration and special authorization to view, search, start a thread or to post a reply. Special authorization can be obtained in one of several ways: by Invitation; Annual $ Donation; or via Special Limited Membership. For more details click here (under development). 3. Administrative/Special Private Forums (special membership required) - These forums are reserved for special subjects or administrative discussion. These forums are not open to the public and require special authorization to view or post. |
|
copyright © 1993 - 2022
SM Publications
All Rights Reserved. Legal & Privacy Notices |